
Dead Cells Guide - First Steps on the Sick Island. Part Three.
Dead Cells guide - First steps on the diseased island. Part Three: a list of essential tips for a successful start; how to learn to run on walls; how to progress beyond the guide...
So, we've reached the finish line. Remember how I said that Dead Cells is Dota 2 from the Rogue-lite world? In this installment, you'll have a chance to root for that assertion if you deftly draw parallels. The guide will be broken down as follows: first the obvious admonitions, which it would be a mistake not to heed. This will be followed by the tips that can be neglected if your style of play differs from the author's vision.
Closer to the finale, you'll be treated to a short itinerary and, at the same time, the answer to the most common question on the game, "How do I run through walls in Dead Cells?" At the end I will exhaustively answer the question, "What's next...?"
Tip #1: Black Roger is not our friend this time...
The first tip on the list concerns PC players. I understand, discounts on the "green store" are always very tempting. I understand not wanting to turn to all sorts of Steam with a cat-in-a-bag purchase. Xbox players are in luck in this matter: Dead Cells is available on GamePass subscription, but without DLC.
But remember, Dead Cells is a must buy! The game is over five years old, and updates and patches are still coming out, and Motion Twin's developers have been fixing the balance for years...

The Dead Cells community is teeming with bloggers who have really excelled at this game. It takes months to learn this Rogue-lite, so there's no shame in taking the advice of more experienced players.
This is where the pirated version stops working. At the time of writing, the current version of Dead Cells was V34. Before that, the game was on version V33 for many months. Just like Dota 2, the Dead Cells update turns the balance upside down. What was best in V33 looks less and less impressive in V34: "Baby Axe" + "Ammo" + "???" = Victory. In V33 this bundle didn't work...
In addition, most bloggers play the current version of the game, release content on the current version; therefore, and builds they will build around the current version ...
...I'm not going to read the moral that pirating games is not good, that the developers were trying and so on. In the case of Dead Cells, the pirated version not only puts you on the same page as the freeloaders, but also cuts off the content. The pirate version has no ladder, no daily challenges, and you can't enable the stream so that your subscribers directly participate in your session as tiny ghost birds.
...The controversy about malware, viruses and miners in pirate versions I don't even want to touch. You are not stupid and are well aware that the more popular the game, the greater the chance that the author will put a hidden miner in the assembly...
Tip #2: Play with a gamepad
I know that I'm opening Pandora's Box with this advice, but I would still advise you to learn how to play with a gamepad. Fortunately, the controls in Dead Cells are perfectly optimized for both keyboard and mouse. But this is where the rules of E-Spotrs come into play: if you're using a regular office keyboard with a regular mouse, you'll constantly die in Dead Cells simply because you're not timed out. If you have a gamer keyboard and mouse with lightning-fast response speed, this tip is not critical for you.

On the gamepad it is much more convenient to use the inspection function: a function where the Headless can look in some direction slightly beyond the fixed camera. On the keyboard it is more difficult to look around, because 4 buttons are added to the control, but on the gamepad the look around is assigned by default to the stick, which is very convenient.
Inspection seems functional until you remember one of the genres of Dead Cells - platformer. Every now and then the player is presented with tasks a la "Jump over the place without touching the spikes," "Dodge the traps," and so on. Examining the dangerous place in advance, you will be much easier to pass it.
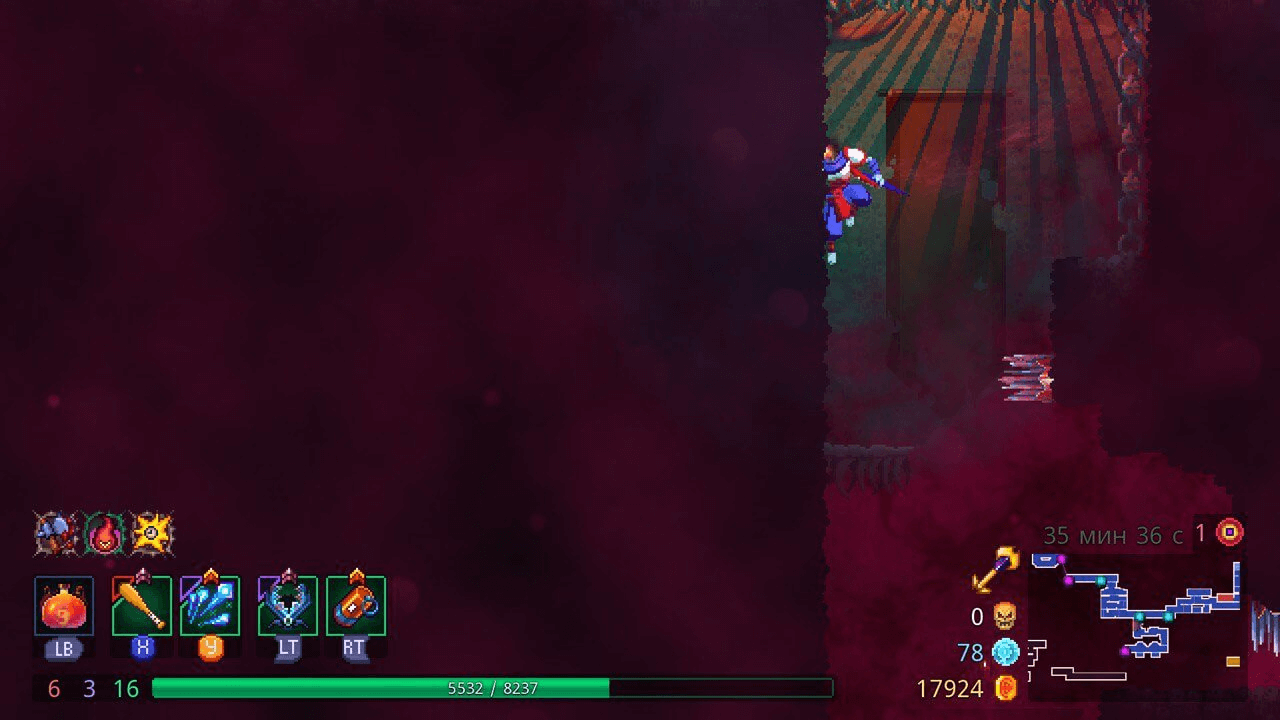
Here is an example from the game: I ran through the location and overcame the platforms. In the first screenshot camera is fixed, I did not touch the stick inspection:
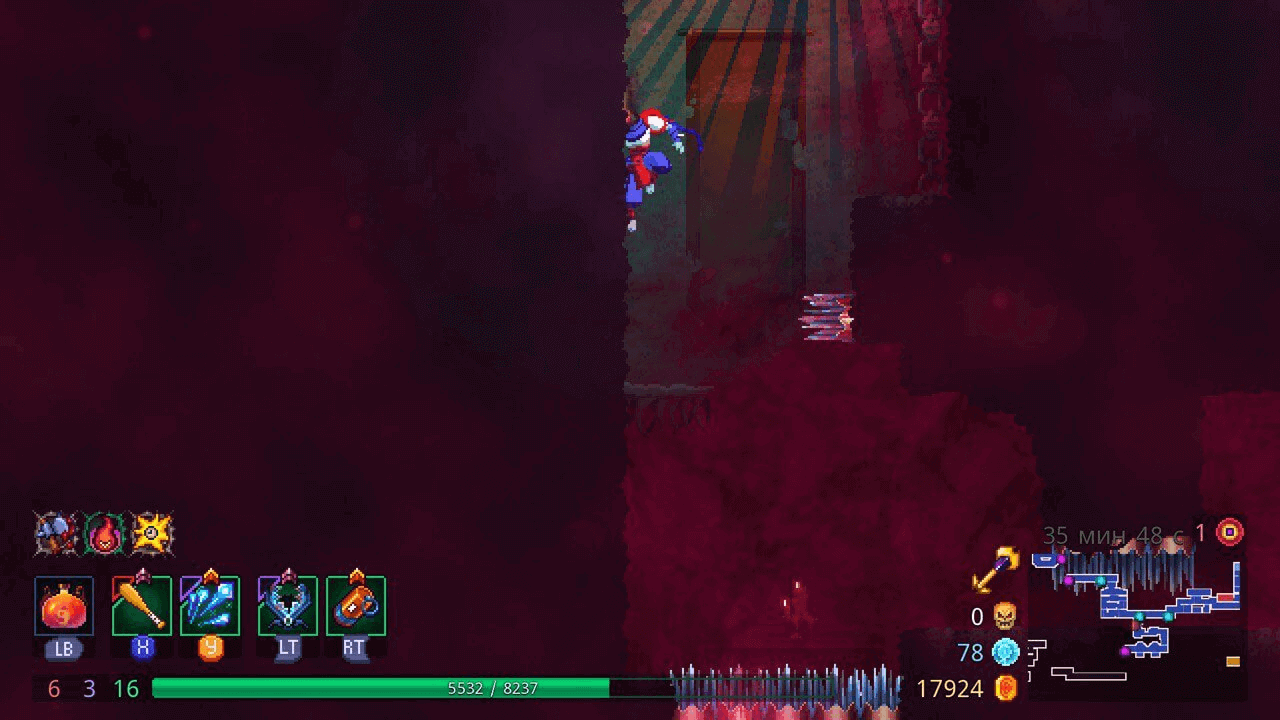
But I gently lowered the camera with the stick and saw the spikes. In the heat of battle, it's not always easy to react and dodge. But the important thing is that both screenshots show the same spot.
In addition, all the buttons on the gamepad are close to each other, you rarely have to squeeze the button, and the response rate is good.
Tip #3: Cultivate the right habits
The most important thing in Dead Cells is not to take damage. The whole game is divided into levels of stem cells. Progress is also counted in these: you start at 0 cells, kill the last boss, take a trunk cell from him. Switching on a new stem cell, you strengthen the mobs, cut down the possibilities to heal, and then play with the timer: "the longer on the location, the more powerful the enemies". For all this torment during the race you earn more gold, farm more meta-progression currency, expand the list of unlockable items, get rare achievements. And in general, your personal skills grow with each next triggered trunk. The further you progress, the greater the value of the treatment. Not taking damage at all in Dead Cells is difficult, but possible - and that's the goal you should set for yourself right away.
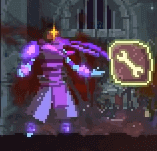
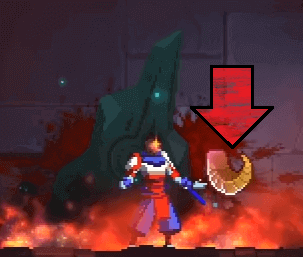
One very interesting, but extremely nasty mechanic can help you get into the habit of playing without taking damage - Curse. Later this mechanic appeared in dozens of other Rogue-lite games and frayed gamblers' nerves. Except that in Dead Cells you have almost no choice - to agree to the dubious adventure or not. From time to time you will come across such chests in the locations:
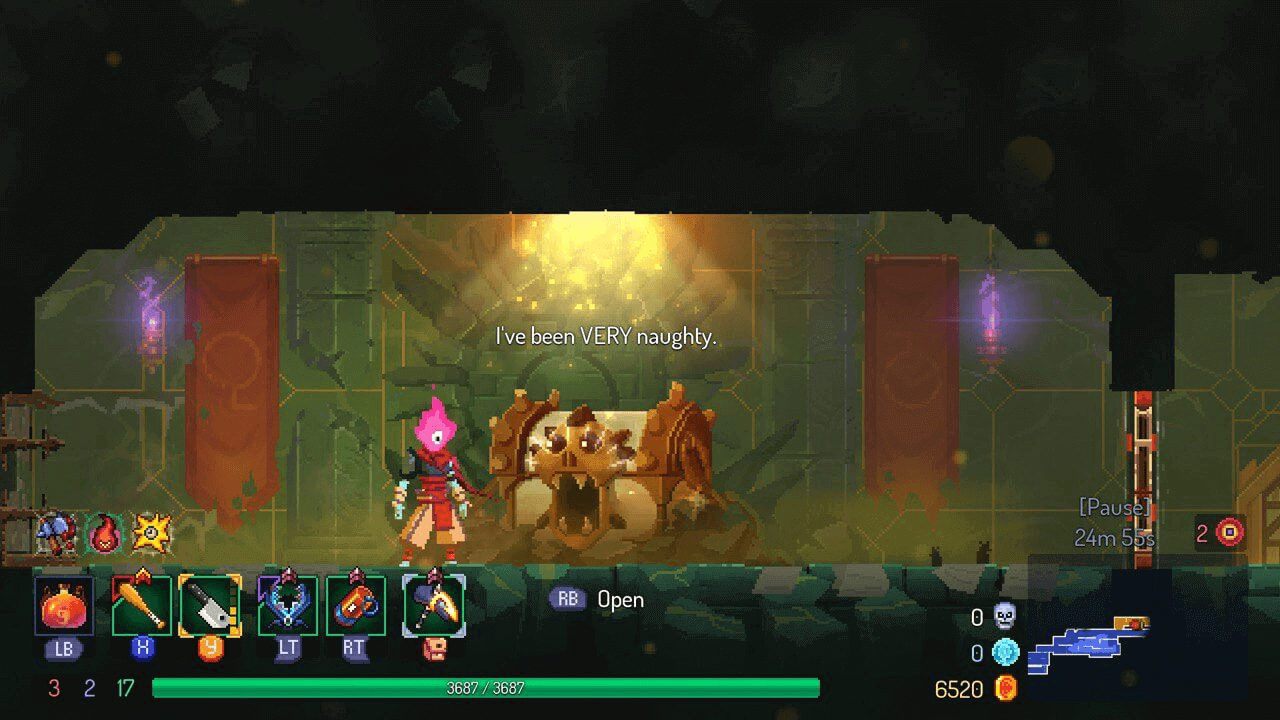
When you open a chest, you get a scroll, an item that will match your pumping anyway, and a gem. You must always open these chests, otherwise you will not accumulate the right amount of scrolls and you will be short of damage.
Remember: cursed chests must always be opened. ALWAYS OPEN CURSED CHESTS!
Exception: if there are no mobs left in the location to remove the curse, and in the next room you are waiting for the battle with the boss.
The curse works like this: you are given good items, but until you kill a certain number of mobs, absolutely all damage to you is fatal. Even if you step into a poison puddle and take 1 damage, you're dead. Exception: the darkness in the "Abandoned Crypt" location - this information won't tell you anything now, but will come in handy in the future.
But if you want hardcore, I'll tell you the author's method of self-discipline. First, unlock 20 items from the Collector: Random Melee Weapon, Random Ranged Weapon, all available levels of Healing Flasks, all available levels of Gold Stocks, then Recycle I, then Recycle II, Backpack. If after pumping all of the above, the Collector does not have "Specialty Shop", then unlock "Napalm Sword", "Infantryman's Bow" and "Blood Sword". I'll tell you why you should unlock it wisely in the next tip...
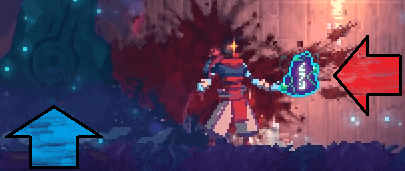
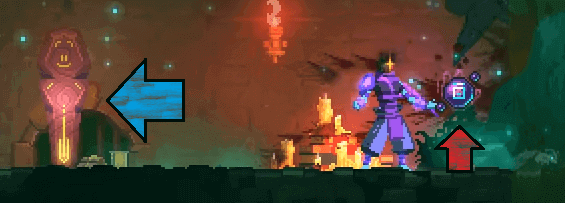
Opens the "specialized store," we start a new run and run to find it throughout the starting location. Do not kill mobs - this is important. We find a room like this, press the vertical button and dive into the first opening:
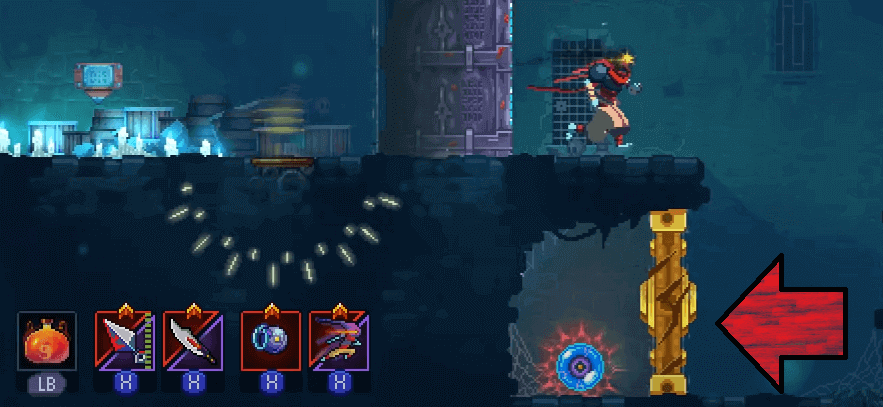
Behind the first door is an item - a hunting grenade. On minimal difficulty we are not interested in its properties, but we are interested in the price of recycling. With the second level of "Recycling" this grenade can be sold for 1000 gold pieces. The amount is frankly modest, but this money will help you buy the item 1 location earlier.
The door, which I marked with a red arrow, must be smashed. For such an act of vandalism, the game will hang a curse that won't go away until you kill as many as 50 enemies without taking damage. At first it will be very difficult, but over time you will notice that you have started to objectively play better.
Tip #4: Don't rush to unlock everything at once
As good as Dead Cells is, it has one major flaw: a broken balance. Some items here are objectively better than others, and many only work in tandem.
The trouble is that the game will fill you up with drawings of items, but you will be able to get acquainted with them only in the battle. All you can find out about the blocked item is the description and the color. If you mindlessly buy all the weapons and skills, you'll play with whatever you get, not what you want to play with. The developers are aware of this problem, so they have provided a "Special Mode". Here you can disable all unnecessary items, enable modifiers, set the initial amount, etc. To unlock the "special mode", go to the location "Prison Towers". There the Runa will fall out of the first enemy. It unlocks the Special Mode:
But "Special Mode" was created for the regulars of this game. In it you can't get new boss stem cells, that is, you can't unlock a new difficulty, where it's more interesting to play.
To keep your cells from going to waste, spend them wisely. Most of the cells should go to pumping the Forge. It looks like this:
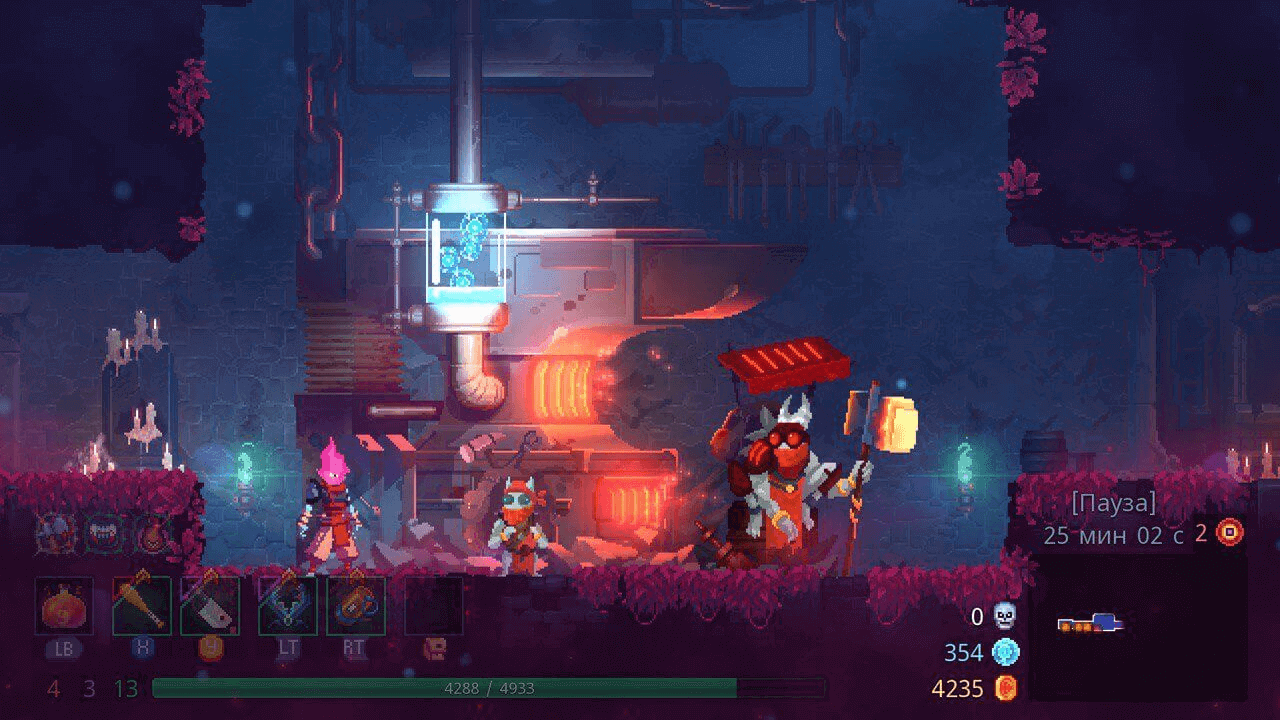
By upgrading the smithy you will be more likely to find items of "+", "++" and "S" quality. The higher the quality, the more additional properties an item has; therefore, it will be much easier for you to find the property you need. Upgrading your forge is very expensive, time-consuming and boring, but vital.
First you need to pump all the general improvements, then invest in the forge, then buy all the mutations and only then gradually unlock items and weapons. By the time you have your forge pumped up, you have many mutations, you'll have your hands full, and you'll be good with items.
How do I run through walls in Dead Cells?
This is the most common Google query for this game. Running on walls becomes possible after getting the Spider Rune.
Runes are a perpetual item that unlocks special properties for the protagonist. Often, Runes allow you to get to places where you were previously unable to go.
The Spider Rune is the most important one. It allows you not only to get to new locations, but also to find geocaches in the location, avoid damage from spikes, kill some bosses without receiving damage, etc.
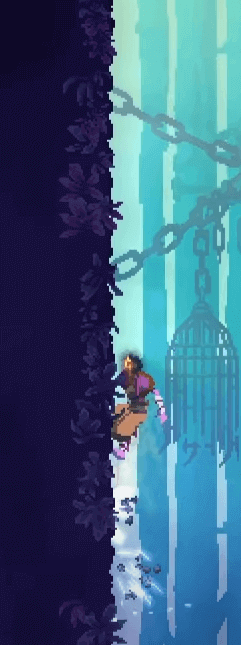
The Spider Fleece is in the Dormant Temple location, but you can't get there right away. First go to the second location "Top of the Doomed". There you will find the Vine Runa. The Vines Runa turns a clump of green slime on the floor into a vines that you can climb. The Vines Runa looks like this:
After receiving the Vine Rune, complete the run or press restart. Now, after passing the initial location, go to the "Poison Gutters" location. Again look for the arena with the elite enemy, kill it and get the Teleportation Rune. The Teleportation Rune looks like this:
Then finish the race or press restart again. With the Vines and Teleportation runes go to the Path of the Doomed. Walk across the entire location and see a locked door and a sarcophagus with a teleport in the water. Teleport, open the door and go to the location "Crematorium". Again the arena, again an elite opponent. Now we have the ram Rune. This is what it looks like:
You can use the ram rune to break through the floor with a barely visible orange rune. After mastering the ram rune, go to the "Poison Gutters" location, then to the "Ancient Gutters" and go to the "Unbearable Tomb" location. The Conjuktivius boss lives there - kill him.
After defeating Conjuktivius go to the "Dormant Temple" location. There you will meet again an elite enemy, from which you will get the Spider Rune:
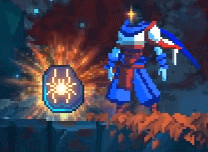
By picking up the Spider Rune, the protagonist learns to run along the walls. You did it. You're great.
I read the big guide. What's next...?
If you've read all three parts of the big guide, you're ready to conquer Infected Island on your own. To progress beyond this tutorial, you need theoretical knowledge from popular bloggers' guides, lots of practice, and a dash of wit.
Don't stay confined to one build for too long; try new things. For no matter how powerful a build you've curbed, there will always be something more powerful, more fun, or more comfortable to play. The replayability of Dead Cells lasts about 400 hours. And all this time you will be discovering something new. One last piece of advice: the build with the bat is good, but it won't make you a God of this game. Take a closer look at...
